I am travelling this week, and won't be making a blog post.
In the meantime, you should go read this.
Tuesday, March 16, 2010
Tuesday, March 9, 2010
How To Build A Virtual PC: The OS - Patch That Up!
Don't forget to force a patch session for your new VPC!

To do this, you'll need to configure Windows Update, and then force it to do a manual scan, if it doesn't automatically. In my case, I configured Windows Update for a daily scan, went to bed, and came back the next morning to patches waiting to be installed.
Hooray for automation! :)
To do this, you'll need to configure Windows Update, and then force it to do a manual scan, if it doesn't automatically. In my case, I configured Windows Update for a daily scan, went to bed, and came back the next morning to patches waiting to be installed.
Hooray for automation! :)

Tuesday, March 2, 2010
How To Build A Virtual PC: The OS
I wound up going with Windows 2008 Server Standard for this build, instead of my intended Windows 7. Let's get to building!
First up, you have to attach the ISO / DVD Drive to the virtual PC. In my case, I was able to attach it by clicking CD >> Capture ISO Image...
You'll get prompted for the .iso file you want to use. Find the file, and click Open.
I have to reset my VPC when I do this. To do that, click Action >> Reset.
Next comes the setup screens.
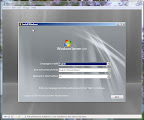

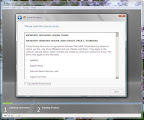
They are rather self-explanatory - for 2008 Server Standard, I accepted the defaults.
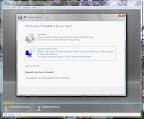
However, because this appears to the OS Wizard as a green fields system, it's going to only allow me to do a "Custom" install.
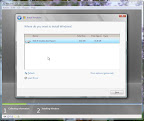
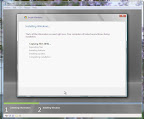
Finally, this is what I wanted to see! One thing worth noting - I put the ISO I built from on a USB drive, and loaded it to my hard drive. It kept my thrash down enough on my hard drive that I was able to surf the web, write some in Word, do email, etc. I don't think I would try playing World of Warcraft, though, while it loads. :)
Almost there....
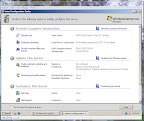
Ah-ha! I have a server!
If you're playing along at home, don't forget to configure and install the available updates from MicroSoft, post-install!
First up, you have to attach the ISO / DVD Drive to the virtual PC. In my case, I was able to attach it by clicking CD >> Capture ISO Image...
You'll get prompted for the .iso file you want to use. Find the file, and click Open.
I have to reset my VPC when I do this. To do that, click Action >> Reset.
Next comes the setup screens.
They are rather self-explanatory - for 2008 Server Standard, I accepted the defaults.
However, because this appears to the OS Wizard as a green fields system, it's going to only allow me to do a "Custom" install.
Finally, this is what I wanted to see! One thing worth noting - I put the ISO I built from on a USB drive, and loaded it to my hard drive. It kept my thrash down enough on my hard drive that I was able to surf the web, write some in Word, do email, etc. I don't think I would try playing World of Warcraft, though, while it loads. :)
Almost there....
Ah-ha! I have a server!
If you're playing along at home, don't forget to configure and install the available updates from MicroSoft, post-install!
Tuesday, February 23, 2010
How To Build A Virtual PC: The VHD - Part 2
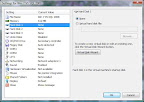
This is the Settings screen you should be seeing from when we left off last time. Click the button marked "Virtual Disk Wizard".
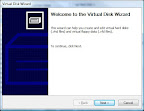
You should now see the Welcome page. Click Next.
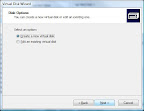
For our application here, you want to create a new virtual disk, so leave that option checked, and click Next.
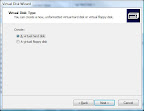
You will now be asked what kind of drive you want to create. Accept the default, "A virtual hard disk", and click Next.
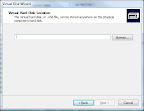
Now, you have to give a location for the Virtual Hard Disk file itself. As a general rule, I put my VHD files into
My Home Folder >> My Virtual PCs >> VPC Name
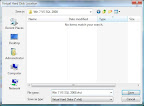
I also name them the same as the VPC, so I can't misplace them. This also helps if I want to give them to someone else - I don't have to explain as much what the machine is for if the file name tells them. :)
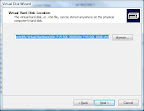
Once you've given a name to your file, click Save. To save the name, click Next on the VHD Location window.
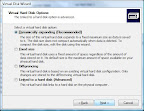
For our purposes, we want to go with the Dynamically Expanding disk size, since this is going to be a database-driven application development VPC.
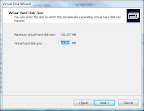
Next is the VHD size. For this, my copy of VPC defaults to 16GB. It will take less space than that, depending on what the OS install puts out there, but 16GB (should be) more than enough room, even with SQL Server, sample data, and Visual Studio. Click Next to continue.
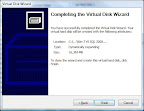
Click Finish to close the wizard. When the file has been created on your disk, you should get a success message popup.
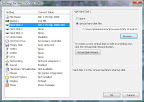
You should now see something that looks like this. You may have to click the radio button and browse to the file location, but that's easy.
Tuesday, February 16, 2010
How To Build A Virtual PC: The VHD - Part 1
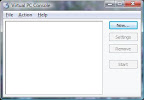
The first thing you'll see when you start VPC 2007 is this screen. From here, click "New..." This brings up the Welcome screen.
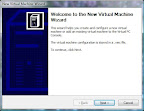
From here, click "Next"
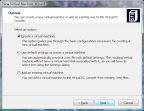
You'll see three options - since this How To is all about making a new Virtual PC quickly and painlessly, we're going to pick "Use default settings to create a virtual machine", and leave the other options alone (for now!).
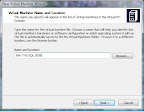
Now, you'll need to give your Virtual PC a name. In this case, I've decided to name my machine "Win 7 VS SQL 2008".
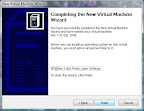
Click Finish to open the settings screen.
Congratulations! You now have a Virtual PC! Woohoo for you! :)
Tuesday, February 9, 2010
How To Build A Virtual PC: The Software
Really, the only thing I'm going to need to build a new Virtual PC is the Virtual PC software itself. You, too, can get a copy of that software right here:
http://www.microsoft.com/downloads/details.aspx?FamilyId=04D26402-3199-48A3-AFA2-2DC0B40A73B6&displaylang=en
Oh, and once you get that downloaded and installed, you might want a copy of an OS. For my example, I'm going with Windows 7. You can get your own copy of that here:
Microsoft Windows 7 Ultimate
After that, everything else is an application, and follows the same steps to load as the OS. I love that about the virtual PCs. :)
http://www.microsoft.com/downloads/details.aspx?FamilyId=04D26402-3199-48A3-AFA2-2DC0B40A73B6&displaylang=en
Oh, and once you get that downloaded and installed, you might want a copy of an OS. For my example, I'm going with Windows 7. You can get your own copy of that here:
Microsoft Windows 7 Ultimate
After that, everything else is an application, and follows the same steps to load as the OS. I love that about the virtual PCs. :)
Tuesday, February 2, 2010
How To Build A Virtual PC
So, I recently had an adventure with Ubuntu 9.04.
Please don't misunderstand - I liked it, I really did.
However! What I found out is that there are just a few things that my daily workflow requires. These are largely application based. In no particular order, they are: MS Office, Synctoy, iTunes, and World Of Warcraft. Some of the things I liked about the Ubuntu experiment were: FFMpeg, Thunderbird's native integration, Ease of setup, Security, and the UI.
Some of the things I missed you can run in an emulation window, or even a virtual PC. However, mostly, I wasn't interested in emulating success, and decided to make the switch back to Windows.
In switching back, I find that although I CAN, I really don't want to be rebuilding my PC again anytime soon. That said, I do need a place to develop some software.
I am going to be building a Virtual PC to solve this problem.
I intend to load it with Windows 7, SQL Server 2008, and Visual Studio.
And no Ubuntu this time.
Please don't misunderstand - I liked it, I really did.
However! What I found out is that there are just a few things that my daily workflow requires. These are largely application based. In no particular order, they are: MS Office, Synctoy, iTunes, and World Of Warcraft. Some of the things I liked about the Ubuntu experiment were: FFMpeg, Thunderbird's native integration, Ease of setup, Security, and the UI.
Some of the things I missed you can run in an emulation window, or even a virtual PC. However, mostly, I wasn't interested in emulating success, and decided to make the switch back to Windows.
In switching back, I find that although I CAN, I really don't want to be rebuilding my PC again anytime soon. That said, I do need a place to develop some software.
I am going to be building a Virtual PC to solve this problem.
I intend to load it with Windows 7, SQL Server 2008, and Visual Studio.
And no Ubuntu this time.
Subscribe to:
Posts (Atom)